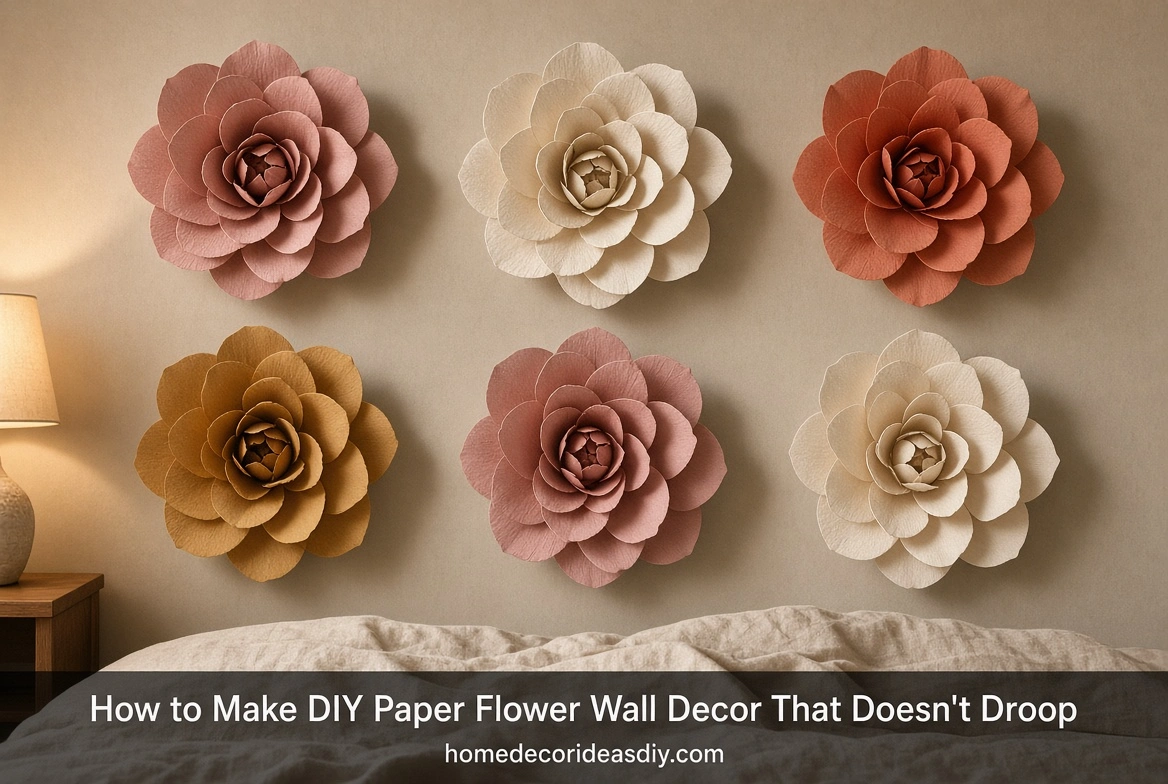
Half the DIY paper flower wall decor tutorials are just party backdrops in disguise, and a party backdrop only has to survive one afternoon and a few hundred phone photos. Put those same flowers on a bedroom wall and around week three the big outer petals start folding forward like they’re tired, one or two let go of the glue, and the whole piece picks up a grey film you only notice when the lamp hits it from the side.
Paper can live on a wall for years, though. It has to be built for the wall from the start, which changes the paper you buy, the glue you use and what the flowers hang on.
Why Party Flowers Fail on a Bedroom Wall?
Nothing dramatic goes wrong. It’s usually some mix of these:
- The paper’s too thin. Printer paper or a pack of 80 lb text weight picked up by mistake, which looks fine flat and sags as soon as a petal sticks out from the wall.
- Low-temp glue sticks, because that’s what came with the cheap glue gun, and they grab well on day one but don’t love a warm July room.
- Tape on the back. Always tape.
- A spot in direct sun, where most colored paper starts fading long before it falls apart.
Fix the paper and the hanging, and the other two mostly sort themselves out.
65 lb cardstock is the weight that holds a petal curl
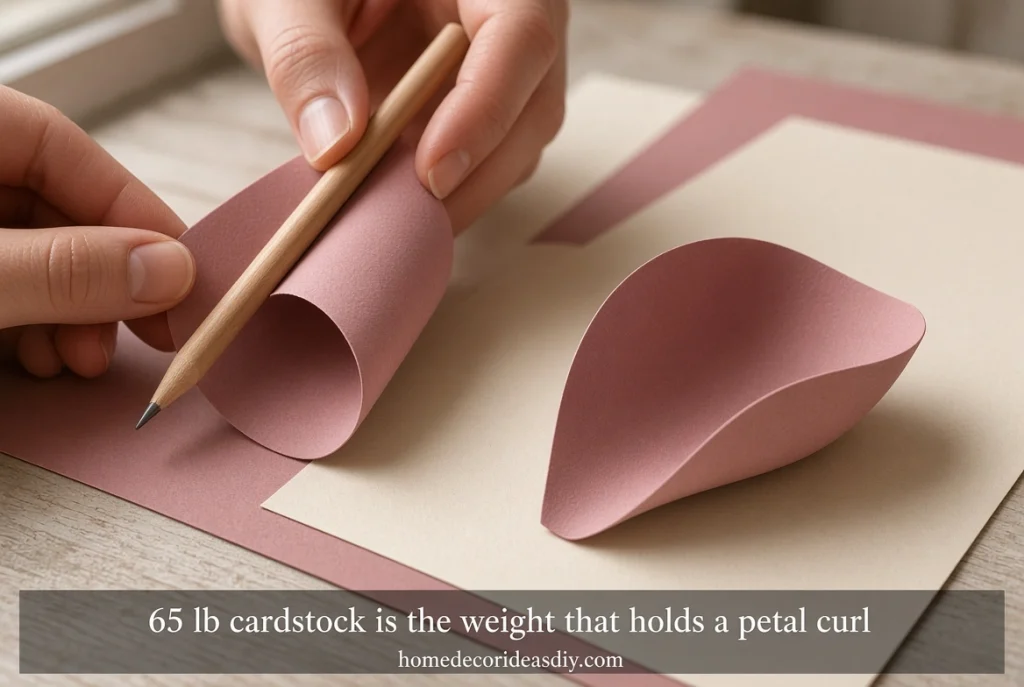
This is the part worth slowing down on, because everything else sits on it. For petals, use 65 lb cover cardstock (about 176 gsm) with a smooth, solid-core finish. Solid core means the color runs all the way through the sheet, so when you curl a petal edge, you don’t get a thin white stripe along it.
Heavier sounds better, and it isn’t. Go up to 80 or 100 lb for petals, and the paper fights you when you curl it, and it tends to crack right at the base of the petal where all the bending happens. Keep the heavier stuff for the round base each flower gets glued onto.
How much paper does one big flower eat? More than you’d think. Sweet Red Poppy, whose large flower tutorials get passed around a lot, budgets a full 25-sheet pack of 12×12 cardstock for each large flower, which changes the math fast if you were planning seven of them in seven colors.
Crepe paper makes softer peonies and ranunculus and honestly looks more real up close. I’d still keep it to smaller filler flowers on a wall, and nowhere near a bathroom, since crepe dye runs when it gets damp.
Building one large flower for DIY paper flower wall decor
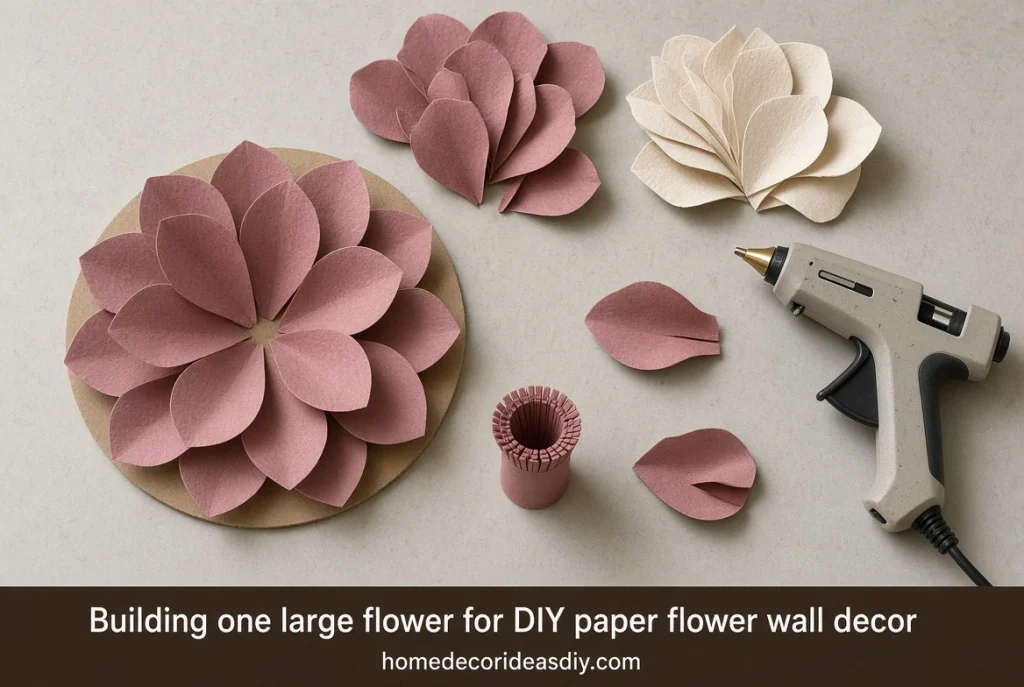
Make one flower completely before you cut petals for the rest. The first one always teaches you something about your template.
- Cut petals in three sizes, each layer a few inches smaller than the one under it. Eight to ten petals per layer is plenty for a flower around 18 inches across. A Cricut speeds this up, but scissors and a cardboard template work just as well.
- Snip a short slit, about an inch, up the middle of each petal base, overlap the two flaps and glue them. That tiny overlap is what cups the petal and stops it from lying flat like a paper plate.
- Curl the tips over a pencil or a dowel. Curl the outer layer tighter and the inner layers looser; the uneven curl reads a lot more like a real flower than petals that all match.
- Glue the biggest layer onto a circle of heavier cardstock or thin cardboard first, then stack the medium and small layers on top, turning each one so the petals sit in the gaps.
- For the center, fold a long strip of paper in half lengthwise, cut thin slits along the fold without going all the way through, then roll it up tight and glue it into the middle.
Use high-temp glue sticks for everything. Let each layer cool before you press the next one on; otherwise, the whole stack shifts a few degrees, and you won’t notice until it’s up on the wall.
My first one had every petal curled the same direction, the same amount, and it looked like a very determined paper plate. Varying the curls fixed it more than any new template did.
Foam board or straight onto the wall?
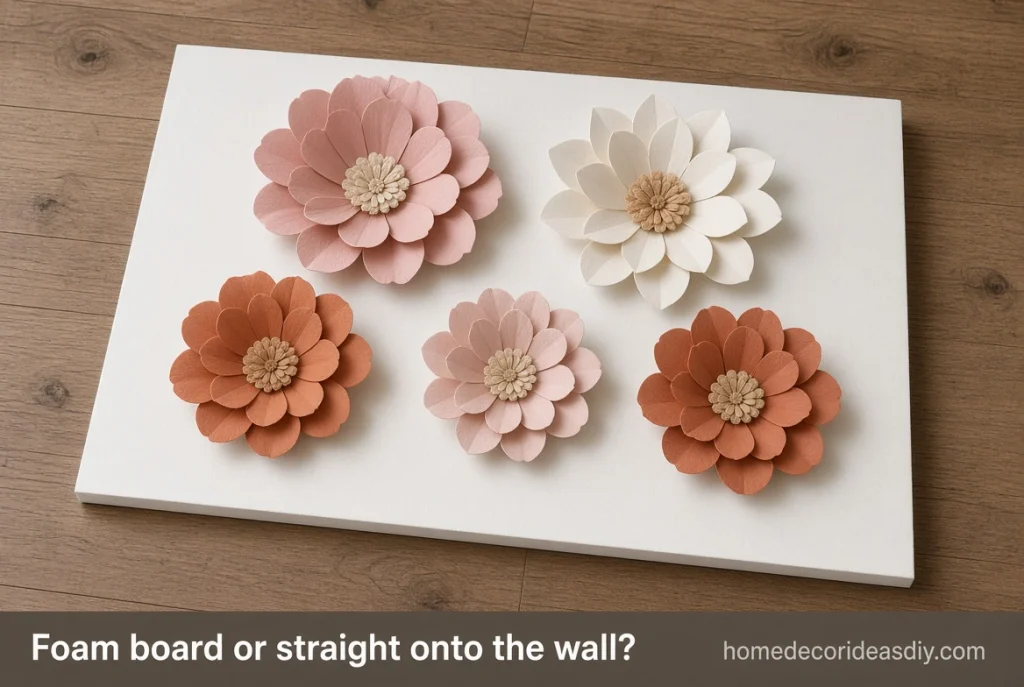
For three or more flowers, mount them on foam board. For one or two, stick them straight to the wall.
Most bigger arrangements use foam insulation board, and for good reason: it’s light, and you can arrange everything flat on the floor before anything goes up. Tikkido’s version, a big cluster of giant paper flowers above a bedroom dresser, went onto a sheet of foam insulation and came in at around twenty dollars in total. Because the finished piece weighs almost nothing, four box nails held the whole board. Paint the foam the same color as your wall first, or trim it close to the flowers, so the edges disappear.
Will Command strips hold a paper flower? For a single flower, yes, easily. Stick the strips to the cardstock base on the back, never to the petals, and pull the tab straight down along the wall when you take it off. If you’ve just painted, the package tells you to wait about a week before sticking anything on.
Above the bed works; the bathroom doesn’t
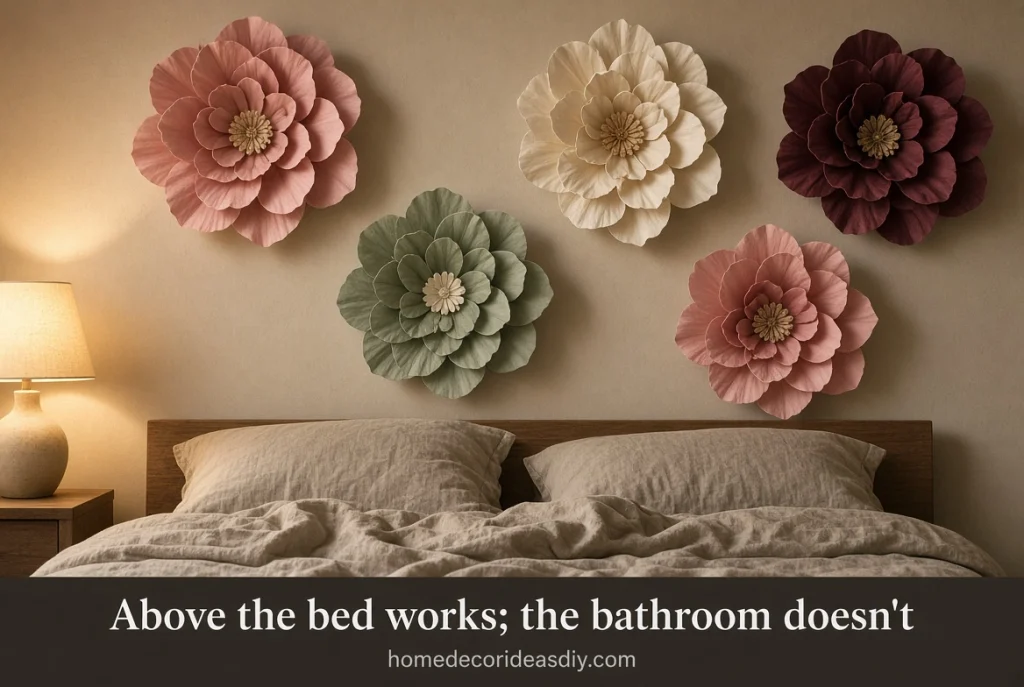
A bed wall is the classic spot, partly because it’s a big blank stretch that would cost a small fortune to fill with framed art, and a cluster of five or seven flowers covers it while the rest of the room is still being worked out, which can take a while, going by these main bedroom ideas.
Skip anywhere with steam, and skip the wall that gets full afternoon sun through the window. A door that swings open hard is also a bad idea; one knock and a petal creases for good.
Light changes these more than it changes flat art. The petals cast little shadows on each other, so a lamp set off to one side makes the flowers look twice as deep, while a single ceiling bulb flattens them into a blob of color. It’s the same problem behind the lighting fix in this modern living room piece, where moving the light did more than any new furniture did.
Dust is the slow killer. A hair dryer on the cool setting, held about a foot away once a month, keeps the grey film off. A soft makeup brush gets into the center.
I’d skip the full flower wall with no gaps, the kind you see behind wedding cake tables. At home it reads like a photo booth waiting for a party that isn’t coming. Seven big flowers with some wall showing between them looks chosen, and it’s a lot less cardstock to dust.