The first thing I ever made was a set of wall panels out of an old TV box, and they looked fine for about two days, and then the paint dried properly and you could see every single ridge of the corrugation pushing up through the white like a washboard. From across the room, it read exactly what it was: a cut-up box on a wall. That’s the whole problem with diy home decor with cardboard, and it isn’t the cutting or the gluing; it’s that the material keeps announcing itself unless you do two or three specific things to stop it.
Those things aren’t difficult. They’re mostly about edges, sealing, and which direction you cut. Once you know them,, the material genuinely holds its own, and I’ve got a lamp in the hall that people have picked up, turned over, and been surprised by.
Cardboard has a grain, and cutting against it is why your edges tore.
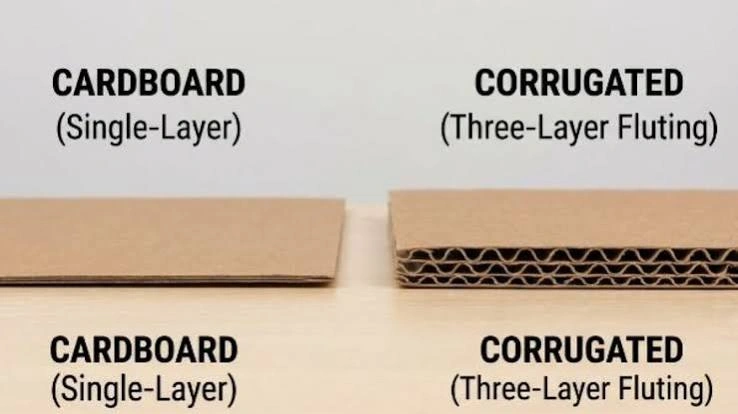
A box is not one sheet of anything. Corrugated fiberboard is a wavy fluted sheet sandwiched between one or two flat linerboards, and those flutes all run the same way through the board, which gives you a grain direction the same as wood has one.
Run your cut along the flutes and the blade travels in the channel and the edge comes out reasonably clean. Cut across them, and you’re slicing through dozens of little arches, so the liner tears and the flutes crush under the blade, and you get that chewed, furry edge.
Bending works the opposite way round. Across the flutes it folds willingly; along them it fights you and cracks. So before you draw anything on a panel, look at the cut edge of the board and see which way the waves are going, and plan the piece around that. It takes ten seconds, and it’s the difference between clean work and a mess.
The flutes come in heights too, labeled with letters, and the ordinary brown shipping box you get from a delivery is usually a middling one at around an eighth of an inch. The thin stuff inside pizza boxes and mailers is much finer, closer to a thirty-second of an inch, and that’s the one you want for anything curved or small because it bends without crushing.
Oh, and blades. A fresh snap-off blade cuts cardboard. A blade you’ve used for twenty minutes drags and tears. I go through more of them than seems reasonable, and the work is noticeably better for it, and two or three light passes beat one heavy pass every time.
Raw edges are what give it away.
This is the tell. Painted flat surfaces can pass for almost anything, but the moment somebody sees that striped honeycomb edge, they know.
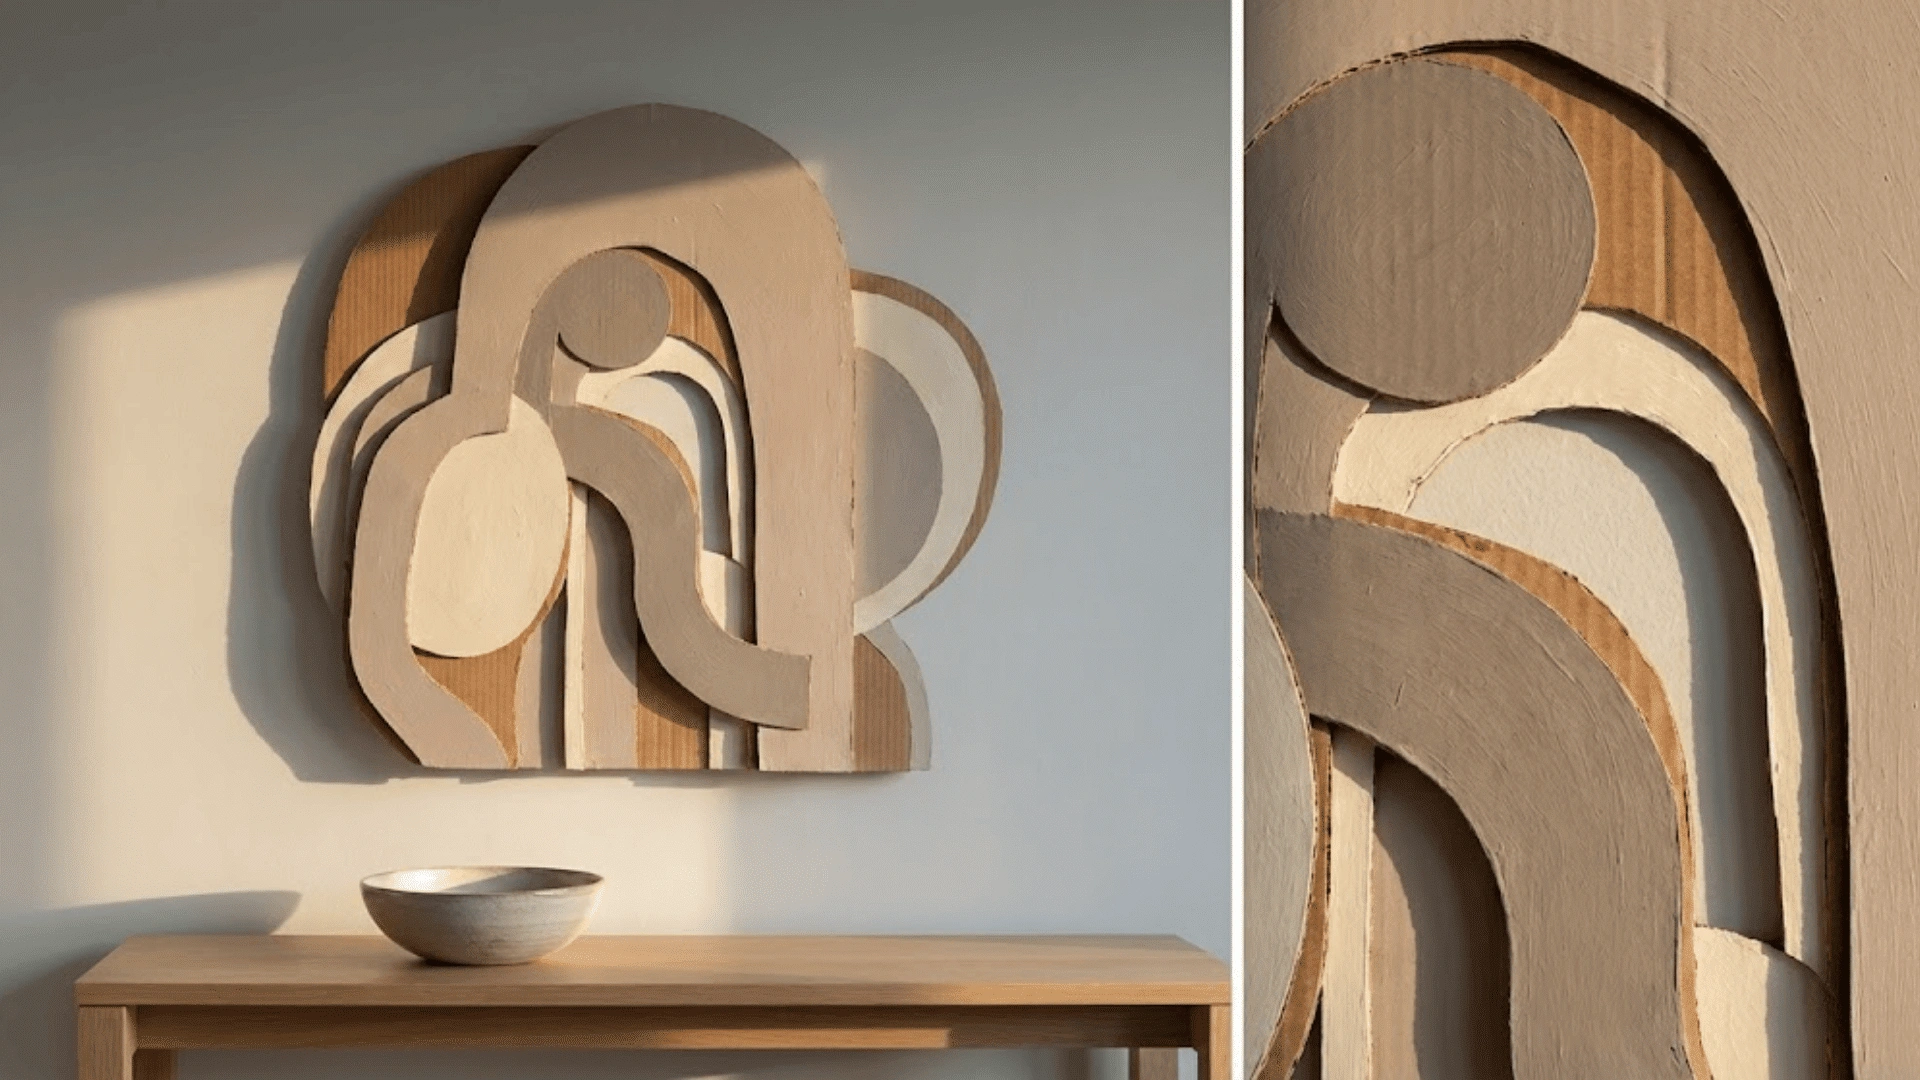
Two options, and they both work. Either you cover it by running masking tape or paper tape around the exposed edge before you paint, which fills the ridges and gives you a solid line. Or you go the other way entirely and make the flutes the design, peeling the top liner off deliberately so the corrugation shows as texture across the whole face. The second one looks far better than it has any right to, especially rolled into spirals for coasters or a vase sleeve.
What doesn’t work is painting over a raw edge and hoping. The paint sinks into the channels, dries darker in the grooves, and draws attention to the exact thing you were trying to hide.
Water-based paint warps it, so seal both sides first.
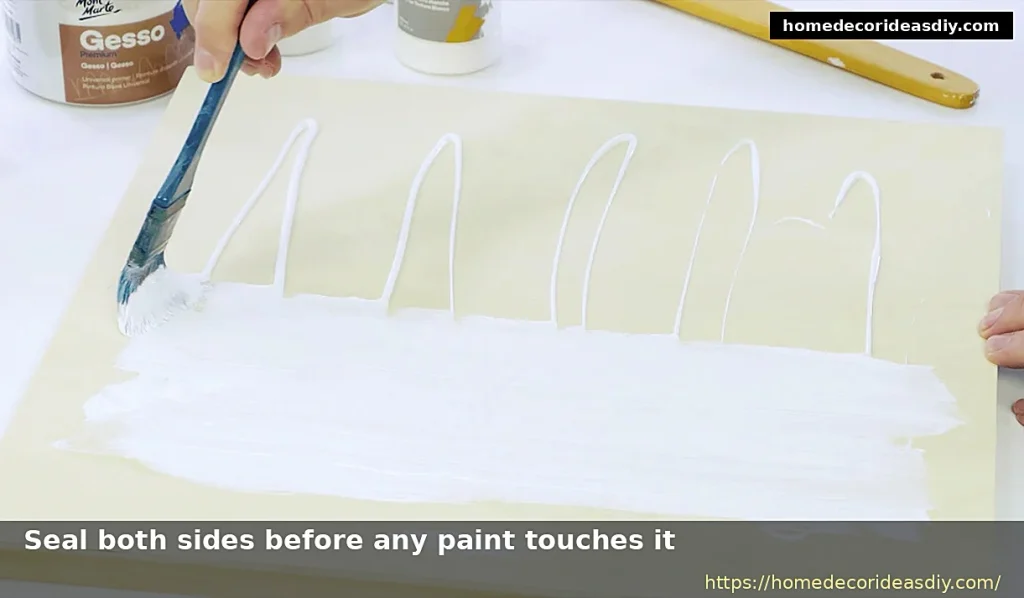
Cardboard is paper, and paper drinks. Brush emulsion straight onto a panel, and it swells on that side, dries, and pulls into a curve that never really flattens again. I’ve weighted panels under books overnight, and they still bowed back.
The fix is to seal it before any color goes near it. Gesso is the proper answer, and it’s cheap. Thinned white wood glue works as well, maybe two parts glue to one part water. Spray primer is the fastest, and it barely wets the surface, so if you’re impatient, that’s it.
Do both sides. Sealing one face and leaving the other bare is itself a warp, because one side is sealed and stable and the other is still moving with the room. Two thin coats a side, sanded lightly between if you want it smooth, and then it takes paint like board rather than like paper.
For a stone- or plaster-style finish, joint compound skimmed over a sealed panel is worth a go. Heavier, takes a day, looks like something you bought.
DIY home decor with cardboard that holds up past a month
Everything here I’ve made, and I’d make most of them again.
- Layered wall art. Cut shapes, stack them at different depths, spray the whole thing one flat color so it reads as sculpture rather than paper.
- Lampshades and pendant covers. Cut slots or rings and let the light come through. Use an LED bulb and only an LED bulb, please.
- Covered storage boxes—the easiest win in the house and the one that actually gets used daily.
- Picture frames. Three layers of lamination give you a frame with real depth, and painted black, it stops reading as paper altogether.
- A faux headboard. Big panels, batting, and fabric on top, hung from the wall so it carries no weight. This is the trick people miss.
- Letters and signs. Double up, tape the edges, and spray metallic. A similar logic applies to these paper flower wall pieces, where the material disappears, and only the shape stays.
- Trays and catchalls. Seal them properly, or a damp glass ends it.
If you want the finished thing to sit alongside more permanent pieces without looking out of place, it helps to look at how showpieces get styled in a room first, because a good cardboard piece placed badly still looks like a craft project.
Laminating gives you thickness that doesn’t bend.
Single-wall board flexes; there’s nothing you can do about that. But glue several sheets face to face with the flutes turned ninety degrees each time, the way plywood alternates its grain, and the result is stiff in both directions and surprisingly hard to snap.
Wood glue, spread thin with a scrap of card, then weight the stack down flat with books for a couple of hours. Three layers is enough for frames and letters. Five or six gets you something you can build a small shelf out of, though I’d still keep books off it and treat it as decoration.
That’s the honest limit, really. Cardboard is excellent for anything visual and anything hollow, and it’s fine for light storage, but it creeps under sustained weight. A shelf that looks solid on day one will sag slowly by month three. Hang things from the wall, don’t ask them to hold anything heavy, and you’ll never be disappointed.
Will it attract bugs or go soft in a humid room?
Yes to both, if you leave it bare and put it somewhere damp. The adhesive holding those layers together is starch-based, which is a large part of why pest control people tell you to keep stacked boxes off a basement floor, and silverfish and roaches are genuinely drawn to it.
Sealed pieces are far less interesting to anything, so seal the underside too, not just the parts you can see. And keep it out of bathrooms. A cardboard piece in a room that steams up twice a day will go soft at the corners within a season, and there’s no coming back from that.
The material is still underrated, mostly because everybody’s first attempt is a raw box with paint slapped on it and that one bad result puts them off for years. Seal it, respect the grain, cover the edges, and it stops being obvious. Skip those, and it doesn’t matter how good your cutting is.